Apologies for the radio silence the last little while, it has been a hell of a ride the last few weeks. I have had a fair bit of misfortune hit me in my personal life. However, that has finally been resolved to a point where I now have some time again to myself and can focus on something better than the recent month!
So to celebrate having at least a bit of my life back I've got myself a few new bits and pieces...
Who am I kidding, it's a LOT more than a few bits!
I recently re-read the 'Oz Invaded' campaign ruleset made by a fellow Aussie gamer called 'Bish', he mostly runs 3mm but he has began to get into 6mm as well - we all have our guilty pleasures right? ;) He made a really interesting campaign for his fellow pico-armour players which I have used to help inspire me to get out there and re-start building my forces.
I found this to be quite inspirational in getting off my butt and building these Aussie forces;
and here's a link to his page if you want to have a look for yourself!
I also have had more than a little inspiration from fellow Aussie 'Tacobat' - this cat is a painting god, seriously, how the heck he can get a miniature to look how it does blows me away every time!
A link to his page as well so you too can sit there and be amazed!
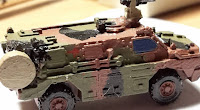
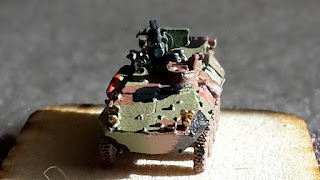
Anyway, back to what I am doing. So following my last posts about my conversion work, I have made some 'Bushmaster' Protected Mobility Vehicles (PMV's - essentially one hell of an uparmoured truck!), some GHQ ASLAV-25's, and a number of CinC LAV-C vehicles with modifications to become ASLAV-PC's - the non-turreted armoured personnel carrier used by our Australian Army Cavalry regiments.

The Bushmasters had a small conversion done to them to give them a
remote weapons station like the ones used in Afghanistan (although they
also use the normal open top as well)

To have the metal sit correctly meant cutting the MG away from the GHQ Bushmaster turret hatch, then very gently sanding it back so the remote turret could sit. It didn't take the super glue well as it is a fiddly attachment, so I used some pigment heavy black-paint as a fixing agent to keep the two pieces together while the glue settled... apart from that little hiccup, it was an easy deal!
The ASLAV-25 is your standard issue GHQ ASLAV-25, they are available for purchase from GHQ right now. A lovely model straight out of the box and I wouldn't be surprised if more than a few of these get used by USMC players for the extra details!
The ASLAV-C seen here is a hybrid vehicle. As no-one to date makes the actual ASLAV-PC in 6mm *it has a 'square' troop compartment at the back as per the images below* I had to go with a 'close enough' approach to the design.
Eventually, I settled with using CinC's LAV-C chassis, primarily for "economy of effort" as I could get them as packs of three rather than having to split GHQ LAV-C/ LAV-L packs. However, the 'Protector' remote weapon system is the same as that used by the US Stryker vehicles, so I bought a number of these weapons kits from GHQ as a parts order alongside my usual orders.
The actual conversion was very easy... if not a little hairy at first!
1. Use a hand-drill to drill a hole at the right size for the weapons systems on the LAV-C.
2. Dry fit - realise the weapons system doesn't sit right with all the smoke grenade launchers.
3. Go back to internet images for cross-referencing, notice that 'our' RWS doesn't have any dang smoke launchers... go back and cut the bottom layer off the GHQ RWS using my Games Workshop pliers (seriously, they make some GREAT pliers...) deciding to leave some on purely for cosmetic reasons.
 | |
| Dangit! *Goes for pliers...* |
5. Paint... now that was the hard part!
The painting for all of these vehicles is my usual mixing style of "When it looks right to me", so do not quote my mix ratios, it is purely an estimate based off what I did. Getting the look right was quite a choice, as you can see in the two pictures below (and the ones above) the actual "Camo" can really take on any variance of tone or sheen depending on the when/where/what said vehicle has been doing...
Australian Army "Brown/ Desert Red" - VALLEJO Mahogany Brown and Vallejoy Beige - Approximately a 90 Brown/10 Beige ratio.
Australian Army "Green" - VALLEJO Russian Uniform, no change, it looked right out of the bottle.
Australian Army "Black" - VALLEJO Black Grey/ German Camo Black Grey / Black... this one literally was a mish-mash as I was never able to get a definitive equal to the glossy/not glossy look the Black gives depending on what light it is in. I think the final mix was about 80% Black grey, and equal measures German Camo Black Grey and Vallejo Black to try and get a mix of the slight grey/satin black look.
Remote weapon station colours - The RWS on the Bushie is VALLEJO German Camo Beige, and the RWS on the ASLAV-PC is VALLEJO German Camo Dark Green.
Windows/ Sights/ Lights - The blue of the windows and sight systems is VALLEJO Andrea Blue, the lights on the ASLAVs (and later on the Bushies) are VALLEJO Old Gold.
So there you have it... the beginnings of my Australian Army contigent - Four ASLAV-25's, Twelve ASLAV-PCs and Five *later to expand to ten* Bushmasters. My force will eventually expand, but I'll follow that in another post.
Anyway, end result... with a few touchups *ASLAV-PC wheels need to be finished etc* I'd say it passes the 'not bad' test from tabletop height! :)


No comments:
Post a Comment